As the vegetable crops slowly come to the end of their life cycle, the next obvious and very important step is seed saving. It’s very important for any farmer to learn to save his/her own seeds for the next succession crop. I never thought I would be one to take the trouble to save seed and all. I always thought I could buy my seeds from my reliable sources like I have done earlier.
I mean why should every gardener save seeds right? Why, when we can easily procure it from various sources. Why waste our time and effort saving seeds?
Here’s what changed that perception for me. During the course of my farm journey I observed something interesting. This observation completely changed my perspective on the need to save seeds and I hope it will change yours too.
Here’s why you might want to save your own seeds:
We had planted various seeds during the sowing season (July) and we also sowed some lady’s finger. We had grown lady’s finger in bags even before we got our raised garden beds ready. And therefore, we had some seeds saved from that crop. But once we started sowing seeds on our raised beds we completely forgot about these seeds and used only the ones we had bought from an organic expo.
Though the lady’s finger plant was growing okay, it didn’t seem to be coming up at the rate it should be and we never thought much of it at that time. Then a month or so later we realized we had some seeds saved from our own lady’s finger crop and decided to use them to start another separate batch.
Now, what do we see? These latter ones grew leaps and bounds and started fruiting gloriously while the other previously planted one was just barely producing a few here and there.
So, Moral of the story:
The seeds you harvest from the plants that had grown on your own piece of land are definitely much better as the plant had gotten accustomed to your place, soil and water conditions. It will definitely yield better because it has adapted itself to the climatic conditions and also developed better pest resistance.
So, it goes without saying that seed saving is the most sensible and valuable asset for any gardener. Because now you have the seed of a plant that has already lived on your soil and knows the place better. With more familiarity, isn’t it going to be easy for this guy to survive and adapt better than some foreign seed which was collected from a plant that grew somewhere else?
Leaving you to ponder over this little food for thought…
Do we follow the same process of harvesting seeds for all vegetables?
Well, No! There are different ways of harvesting seeds for different vegetables. I have harvested almost 45 varieties of vegetables in the past 6 months; tomatoes, brinjals, lady’s finger, gourds, pumpkins, beans, cucumbers, radishes, beetroots, various greens and many more. And I have also tried my hand at saving most of the seeds from my produce, except for the root vegetables.
Seed saving is very different for different vegetables. It’s different for watery, fleshy vegetables compared to vegetables with seed pods. I will share a few of them here…
Seed saving process is quite different for different types of vegetables. Lets go one by one.
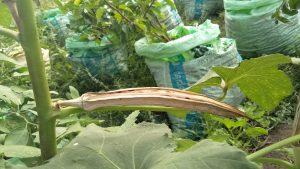
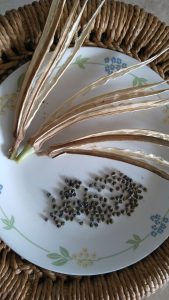
Seed saving in podded vegetables:
In case of lady’s finger, beans and podded vegetables, it has to be left to dry on the plant itself till they start cracking open.
Step-by-step instruction for saving seeds from fleshy vegetables:
When it comes to cucumbers, tomatoes and fleshy vegetables, we have to use the wet method of seed removal. I know it might seem like a daunting process if you are a first time seed saver but believe me it will become second nature and you will be doing it without giving it a second thought very soon.
- Remove the seeds and collect them in a bowl of lukewarm water.
- Allow them to ferment for about three days. This helps in removing the gel coating surrounding the seeds.
- Stir this concoction daily and change the water if it gets too cloudy.
- This fermentation process kills viruses and separates the good seeds from the pulp and the bad seeds.
- The good seeds will sink to the bottom while the bad seeds and pulp will float at the surface.
- Pour off the pulp, water and bad seeds carefully using a strainer after three days.
- Transfer the good seeds on to a paper towel to remove excess moisture.
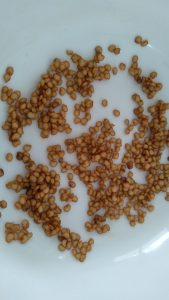
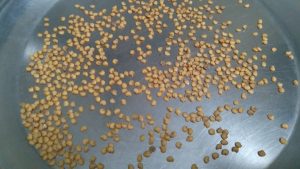
- Spread them on a plate and air dry them for few days.
- Store completely dry seeds in a dry air-tight container.
- Use the seeds within 3 to 6 months as they might lose potency with longer time.
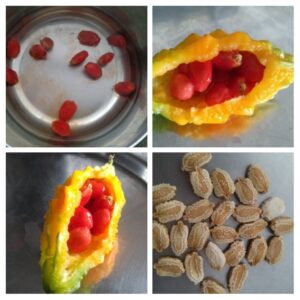
For bitter gourd:
- Remove seeds from ripened Bitter gourds.
- Wash the pulp off by gently rubbing them in a bowl of water.
- Remove the pulp and place the seeds in a paper towel.
- Once it’s dry, spread it on a plate and let it air dry for a few days before storing it in air-tight container.
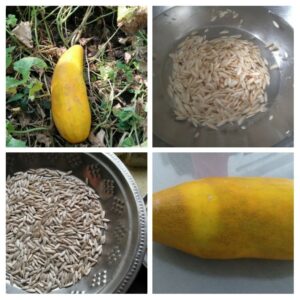
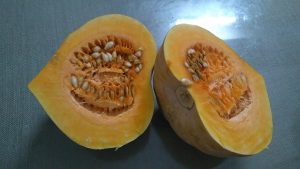
For pumpkin and squash varieties:
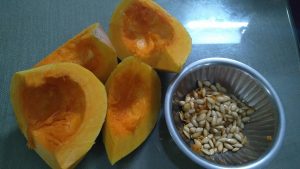
- Take the fully ripe pumpkins, break them open and remove the seeds.
- Hold the seeds under running water, rubbing them between your fingers to remove any stringy material and membrane.
- Then lay them out on a plate to dry.
- Let them air dry for a few days and then store them in an air-tight container.
Seed saving for non-fleshy veggies:
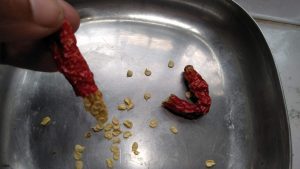
For Capsicum and chillies:
- Cut peppers open to find the seeds in a mass on the central stem.
- Brush them off the stem onto a plate.
- Put seeds aside to dry.
- In case you are saving seeds from multiple varieties of chillies (like the long, short or round variety) make sure to leave the external part along the plate for easy identification. Because all the chilli seeds look alike and it might become difficult to identify later.
- After they are air dried, store them in air-tight containers with their names and varieties marked on the container with a marker.
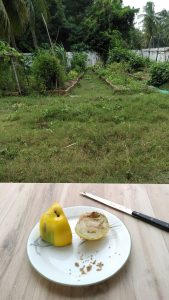
Brinjal/Eggplant:
- Let the brinjals fully ripe and mature (turn yellow) on the plant.
- Pluck them at their ripest best and make a small slit at the sides or base and try to break it open.
- Cutting through with a knife is not advisable as you might slice through the seeds and then it’s absolutely waste.
- Pry open the fleshy part with your fingers and remove the seeds.
- Hold the seeds under running water, gently rub them to remove any membrane.
- Then lay them out on a tissue paper to remove excess water and then transfer it to a plate to dry.
- Let them air dry for a few days and then store them in an air-tight container.
10 Things to Know If You Want to Start Saving Seeds:
- Growing a Plant to Save Its Seed Is Different Than Growing It to Eat
- Know Whether your Parent Plant Is A Hybrid Or Native/Heirloom variety
- Don’t Bother Saving Seeds of Hybrid Varieties. Save only from native varieties.
- Save Seeds from the Best Plants
- Remember Seed Saving Can Be Tedious
- Seed Saving can get a little bit stinky
- Seeds Aren’t Viable Until Fully Ripe
- Well-Dried Seed Is Viable Seed
- Proper Storage Is Important
- Naming and labeling with details of date is very important
That’s my two cents guys. I hope I was able to answer a few of the questions you had in mind about seed saving. I sure hope that I was able to convert at least a few of you who were sitting on the wall about this.
Just hoping…
Seed saving and seed sharing is the only way forward to beat the hybrid invasion and protect our native plant varieties. I have written a separate post on the importance of seed saving
Let’s join hands and be a tiny drop in this huge revolution of saving indigenous native varieties.
Grow native. Buy native. Eat native.
Boycott hybrid. Boycott GMO’s
If you like what you read, you can subscribe to my blogs by clicking HERE and to my FREE Newsletter by clicking HERE