This is post 6 of the series I am writing wherein I share my personal experiences and thoughts from the past year. This is the post where I write about how I planned and made my raised garden beds drream a reality. If you haven’t read my earlier posts, please click on post 1, post 2, post 3, post 4, post 5 to read them.
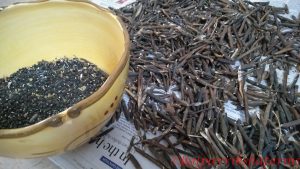
In my last post, I shared how we prepared the soil for plantation. This post is all about that beautiful raised garden beds I had been dreaming about. We had sowed black gram (urad dal/ulundu) mainly to enrich the soil as this being a leguminous crop, helps in nitrogen fixation. But to my surprise it grew so well that I had the privilege of harvesting and de-seeding the pods myself.


I am so smitten by it that I used the whole urad without removing the skin in my idly batter. Though the batter wasn’t exactly white and my idlis didn’t turn out exactly white as mallipu idly (a saying in Tamil, meaning as white as jasmine flowers), I was ecstatic. And you know what, it adds fibre to the dish, so why not?Only when we grow something ourselves, do we understand and appreciate food.
Now I know why farmers act a little crazy sometimes.
The harvest completed, we ploughed the rest of the plant back into the soil to enrich it with nitrogen. A few weeks later, we start planning and preparing Raised Garden Beds for my vegetables.
This is what we plan for our raised beds:
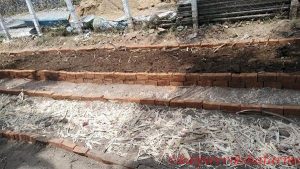
We measure the whole area planned for the vegetable patch. Given the space, we will be able to prepare 7 beds of 40 feet length with 4 feet width each. We plan to have a gap of 2 feet between the raised beds to accommodate walking space.
We need to start lining the measured beds with bricks to contain the layers intact. We plan on following the steps listed below in making the raised beds ready.

Instead of sugarcane husk, any other dried organic matter can be used too like dried twigs, branches, hay etc.
3 JULY 2018
Work on raised beds starts on the farm. Our estimate is that it should take us one week’s time to finish with 4 farm helpers on full-day shift.

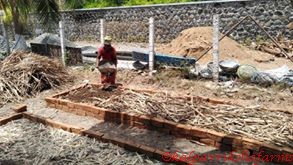

So far, in two days 4 such beds were made ready and there are 3 more to go.
Packing my lunch and leaving in the morning with the sun at its scorching best, it’s been a hectic couple of days. But it was definitely quite fulfilling… Because I finally got to see the real garden beds that existed only in my sketch book and in my dreams up until now.
You will see the finished look by the end of the post.
It took a lot of slogging and sweating to finish up the last bits… But boy, what an eventful and amazing week we had!
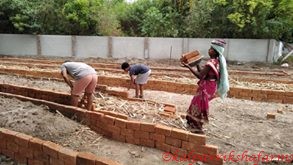
Though the major part of the work was done by hired farm workers, we fully involved ourselves doing whatever our “air-conditioned, indoor-loving, heat-repelling, sedentary-lifestyle-accustomed” bodies let us.

We know by experience that nothing that is given to us on a platter without any effort, ever fills our heart with joy. We won’t appreciate it unless we had earned it with hardship. Success tastes that much more sweeter if you had worked hard to earn it, isn’t it!
So here’s the final look of my raised garden beds after one week’s hard work…


Plan well, and then, just go ahead and execute.
That’s what I did! Believe me, you won’t regret it. Good luck with your raised garden beds.
Once your raised beds are ready, what else is there but to sow and reap!!!
If you like what you read, you can subscribe to my blogs by clicking HERE and to my FREE Newsletter by clicking HERE